Showing posts with label Keeping Up Appearances. Show all posts

Wednesday, September 18, 2013

Family Room Progress

Renovations have begun on our family room!  We're about a week in and reaching that point where every day we come home from the office hoping for monumental progress to find...a few wires sticking out of the wall that weren't there when we left.  It's a process and we've been through it before.  To give a preview of what is to come, I will start with my inspirations for the space.


My color inspiration came from one of my favorite shirt/sweater combos--grey and white.  This translated into Benjamin Moore's Titanium:


A bit more subtle than my sweater and perhaps a little more on the warm side, I love the way it plays with white.  There is going to be whole lotta millwork going on in this room, so the color needs to sort of disappear.

Here's what we were dealing with before the contractor took the crowbar to the walls:


If you look veeerrrry carefully at the wall with the small quilt hanging, you may notice that the wallpaper chair rail isn't exactly straight.  There is a very good reason for that quilt.  It's covering a huge diy disaster.  Originally, there was a doorway from the foyer in that spot.  Other renovations were done and in the second photo where you can see the floor surface change, there used to be a wall.  Once the wall was gone, I suspect this created a real furniture placement challenge, ie, no place to put the couch.  The answer was to remove the opening (no biggie), however, the execution lacked, shall we say...finesse.  Other issues included knotty pine paneling that had been painted over (aren't the knots lovely?), the fact that none of the molding is properly mitered/caulked (see the beams and cove millwork where it meets the ceiling).  The beams came with the house and underneath are a stained walnut.  They were going to be hard to remove since they're sort of part of the structure, so my solution was to create a coffered ceiling by adding cross beams.  Something like this, but not quite so heavy:


Here's what we have right now:


The paneling was removed to find a whole lot of nothing behind it besides insulation.  LAM's big request for the space was a pre-wired sound system / home theater setup.  Since we have a car club pal in the business, Hi-Fi Sales in Cherry Hill, NJ is working with our contractor to wire us up.  I had no idea what would be involved with having a seamless installation, but it's coming along nicely.  The wall above was packed out and plywood hung to provide a solid mounting base for the tv.

On the fireplace, we'll be hiding the bricks with carrera marble subway tiles, something like this:


The mantle and trim pieces will be cut down so it's not so high in order to provide clearance for the tv and painted white to match the rest of the trim and a new fireplace screen yet to be determined.

Against the window wall will be a built-in window seat with bookshelves on either side:


This seems the perfect solution for that side of the room, but I'm not sure how to keep dogs out of the window.  It's inevitable that it will be their favorite place in the house and my whole existence will spiral down to nothing but worrying about windexing and stressing about scratches.  We'll see.  Either way, we can't wait to see it all finished!

~ESM

Wednesday, September 11, 2013

Work Space


Moving right along on our slightly derailed tour brings me to one of my favorite rooms--my official studio.  The smallest bedroom, it was previously home to a little girl and the decor was something that was left over from two older brothers that was "spruced up" for the new baby.  As she aged, things were added to the room that kids tend to accumulate--books, toys, tv's, etc.


These are not the greatest "Before" shots, I admit (I will blame LAM for that), but you kind of get the idea.  The room suffered from the same affliction as the others, weird stucco/stipple plaster ceiling, chair rail and wallpaper that had been painted over.  In our previous house, we installed wainscoting in one of the bedrooms and I loved the look (it's also a great way to cheat if someone has painted wallpaper and you can't get it off).  I lost the color war with LAM in the other house and it was painted green, which I hated.  I wanted white and since this was to be my space, it was GONNA be white.


Voila--new doors, hardware, trim, wainscoting, refinished floors and fresh paint!  Due to the fabric intensive nature of my Etsy store, keeping this room neat and tidy is a constant struggle.  Usually, I go in cycles with frenzies of activity (I'm in one of those phases right now trying to ramp up for the holidays) and then a re-group where I go through inventory and neaten everything up and take stock.  These photos show things in mid swing--it hasn't reached critical mass, but we're getting there...


The lamp placement is...odd...I know.  I am one of those people who can NEVER have enough light--especially when I'm working.  The obvious solution would be some sort of overhead light, which is a project for the future.


This table has an interesting story.  When I was little, my parents bought an old farmhouse and in one of the bedrooms, the wife had a sewing studio (much like mine).  This table occupied one whole wall.  My father, who was a wedding photographer, eventually turned that room into his office/album assembly room and cut this table down to a size that worked for him.  When he retired, I inherited the table so it's back in the game! It is command central for my fabric storage just like it was for Mrs. LaRosa all those years ago.  The carpeted top keeps things from moving around and provides a soft surface for laying things out.  The bolts on the left are new fabric getting ready to go into the queue and the stack on the right are pre-cut bag holders that are ready to sew.  When I have my act together, I can just grab a pre-cut setup to replenish the store when something sells.  Different Etsy sellers have different methods, and while it's really time consuming, I prefer to make the items, photograph them and put them in the store because 1. I hate surprises myself and want my customers to be able to see the actual item they are purchasing, and 2. Because receiving an order for something that isn't finished and ready to ship stresses me out.


The table with the small ironing board on it was a circa 1920 left behind in our old house.  The large table in the middle was a well-battered kitchen reject from a friend that LAM refinished.  The top is now buttery smooth and the perfect place to roll out bolts of fabric.  The photo to the right of my sewing machine is my grandmother.


She hovers over me like a muse while I work.


Speaking of hovering while I work...Nick, like all Border Collies, is positive that if he didn't supervise, nothing would ever get done.  Don't worry Nick, Santa's Elf is on it.

The rug is from Target's Shabby Chic line.  I love the soft colors and the way it plays with the natural wood on the floor and the white woodwork.

~ESM


Thursday, August 22, 2013

Mastering it

Our biggest renovation accomplishment to date is probably the master bedroom and bath.  All things considered, it was probably the worst room(s?) in the house--for several reasons.  While there were no shortage of things in our house that didn't make any sense, this one took the cake.  For one, someone had the bright idea (probably sometime around the late 70's) to add a textured plaster surface to the walls--think stucco.  We knew when we bought the house that getting rid of it was going to be a problem.  For years we dragged our feet to come up with a solution because everything we could think of that would make it go away was really expensive and when you spend big money on your house, you kind of want to be able to tell that you did something, as opposed to just making walls look like normal walls.  We worked on other things until one day, the shower started to leak under the pan.  Time was of the essence to remodel the bathroom or suffer a homeowner's insurance claim--not good.  After deliberating, we decided to just do everything in one shot.  The other cause for concern was that, for reasons known only to them, the prior owners decided to install a Pergo knock-off product OVER the hardwood floor.  The only reason we could think of that would cause anyone to do this would be if there was some horrible damage that they didn't want to fix and just wanted to cover it up.  We were not just a little bit scared to see what was under the plastic.

Here's how it looked before:


It's really a shame that you can't see the stucco finish on the wall, because it was bizarre.  The stenciling was also unfinished on one wall--like they just got tired of the project and gave up on it.  You can also see through the doorway that there is a dressing room.  There was a closet on the left side that was created with spare bits of drywall and other scraps of wood.  It defied description.  The closet was not there when the house was built, so the light and mirror on the wall are not centered.  I think there was originally a countertop and another light that was removed.


The one redeeming quality the room had was its size, which makes the dresser against the closet door a real head-scratcher--it's not like there was no place else to put it.


Another charming shot of the dressing room.


Ah, the shower.  LAM refused to use it.  The interior was even less attractive than the exterior and you can see the lovely faux marble counter.  The floor was also the mini-speckle tile wet bed job as the other room, only in this room they put square vinyl stick-on tiles to cover it up.  As long as I live, I will never understand fuzzy toilet seat covers.

Ok, now for the fun part:


Since the prospect of dealing with stucco walls was too daunting for us to deal with on our own, we hired a contractor--who had a method of dealing with the walls.  He sanded the stucco off as much as possible and then skim-coated them.  They came out beautiful--perfect--straight.  Brilliant.  And the floors?  We removed the plastic stuff to find...nothing.  Just regular old hardwood that had been covered with carpet at some point, so it needed to be sanded and buffed.  No holes, animal damage, paint spills or any of the hundred other things we thought might be under there.


The decor was a compromise.  It's not 100% my style as LAM decided he was going to have some input.  It's WAY too matchy-matchy for my taste, but it is clean and bright and soothing.  The plaid was his idea and the bedding was mine.  Bedding is Restoration Hardware and I love this duvet/sham set.  It has been through the wash countless times and still looks brand new.  The curtains and pillow are Country Curtains--this was LAM's contribution--I'm not crazy about valances, but long panel curtains just weren't going to work since they would interfere with Nick's bed and the laundry baskets.  The carpet is a wool remnant that we had bound.  I love the little black diamond pattern and that it doesn't show footprints.  The chair is IKEA and the white slipcover is $29.  If something terrible happens to it, it can go in the wash, but buying a replacement isn't the end of the world.  I have two and rotate them out when one is in the wash--black dog--white chair--you do the math.


We replaced the luan closet doors with two doors that swing out.  This is LAM's closet--the door pulls are Anthropologie.  They have the best funky knobs and pulls; we've actually used them on several closet doors in the house.  The laundry baskets are Pottery Barn, lamps--a Homegoods find.  Below, Nick surveys the finished product.


This is the dressing area now.  We re-built the closet (it's kind of tight for taking pictures), replaced all the molding (like in all the other rooms) and built a pocket door on the bathroom.  This is absolutely the BEST way to deal with doors on a small bathroom.  We also added more halogen pot lights (I would love to have these follow me around all the time--they make everything look better) and the back area created the perfect little cubby for my antique armoire.  There couldn't be a better place for a full length mirror.


The bathroom is actually a decent size--just not big enough for a large soaker tub or double sinks.  Since we have the nice jetted tub in the hall bath, it's not been an issue and we survive just fine with the single sink.  We thought long and hard about how to re-arrange things to accommodate a double sink, but I didn't want to give up my closet/dressing area.  It works great for us.  We went with marble floor tile, subway shower and wainscoting tile with travertine accents and floor.  This was before the shower door was added--it's just a large panel of clear glass with a polished nickel vintage-style handle.  When we removed the triangular pod shower, we just built a long shower that went from one wall to the other.  There was enough space for a standard sized tub, but we liked the big walk-in shower better.  The toilet is Kohler, vanity and top were an off-the-shelf item from Lowe's with hardware from Restoration Hardware.  All fixtures, medicine cabinet and overhead light are Restoration Hardware.  Since we've added the shower door, window treatment and wall art, the room looks a bit different now, so I'll post some follow up photos later.

After doing most of the other projects ourselves, hiring a contractor was a real luxury and we will be doing it again for kitchen/family room because...um...we're not crazy, but I'll be designing the changes and picking out all of the materials myself.

~ESM

Monday, August 19, 2013

You Have to Feature it.

Moving right along, the next step was dealing with the three spare bedrooms.  Each presented its own unique set of issues and challenges, but perhaps none quite like what I'm about to show you.  This room was going to have an awkward layout no matter what because of the position of the stone fireplace directly underneath it and the duct work next to it that feeds the furnace in the basement.  All of this stuff had to go somewhere, so there was going to be a bumpout in the room--no way around it.  The architect who designed the house chose to take something that was annoying and make it a WHOLE lot more annoying by adding a double closet to the other side of the room--the end of which basically blocked the door.  It was both an aesthetic disaster and it made moving furniture into that room almost impossible.  Let me show you:


Charming, isn't it?  Since this bedroom is at the end of a long hallway, this was the view--or complete lack thereof.  I don't know much about feng shui, but I'm pretty sure this violates every rule imaginable.  The plastic football door knob was a bonus as well as whatever that weird thing is nailed to the wall above the adjacent bedroom.  Removing it destroyed the wall, so the hallway needed major drywall repair.


The view from the inside of the room.  Since this was the bedroom of a teenage boy, he didn't have much need for two closets, so he turned the other closet into a desk area.


Not exactly something you would pin on Pinterest...


This is the other side of the room--you can see the bumpout on the right side.


This is a better shot.  In addition to simply looking odd, it made furniture placement, well, strange.  There simply was no good way to do it.  Other issues included the chair rail, which was poorly done and really made no sense and the plaster textured ceiling.  This was not a simple popcorn ceiling that could be easily scraped off--it was PLASTER and it was cracked, yellowed and just generally awful.

Staring at the room one day, I had a revelation when I remembered an old Saturday Night Live skit where John Larroquette was playing Bob Vila walking around a house that suffered from demonic possession.  The homeowners pointed out a "hell mouth" and asked Bob what could be done about it.  His response was, "Well, you have to feature it--you know make it into a fireplace and roast marshmallows and tell scary stories."  This was my hell mouth.  So I decided to feature it.  I decided that this strange void in front of the window was...duh...the perfect place for a window seat.  Ditch the stupid door-blocking closet and build another one in front of the bumpout (basically, just bump it out more) and the extra space will accommodate a larger window seat.  Create a hinged lid on the seat and presto! instant extra storage.  Since we were tearing down walls, repairing flooring, etc, this is one of the rooms where we just got rid of most of the drywall.  In the end it was easier--particularly the ceiling.  Here's how it came out:


Current hallway view.  We replaced all of the luan doors with six panel white ones and European door handles, replaced all of the trim around the doorways, baseboards, etc., replaced the overhead light and painted my favorite color at the moment: Benjamin Moore "Night Mist".  Now you can actually see into the room.


We also added crown moldings (we did this to most rooms) and halogen pot lights (I LOOVVVEE the warm glow these lights give off).  Eventually, there will be a custom down cushion, just as soon as I decide what fabric to use.  The roman shades were off the shelf from Lowe's.  I really like how clean and beachy they look--adding something to the window without really blocking out much light.  I can never seem to get enough light.


Here is a better view of the face of the closet.  Still slightly awkward, but at least this makes sense to me.


The bed could be moved over a bit to give a better flow, but I like the view of the chair from the hallway.  If we host another exchange student, I will probably swap it out for the dresser and desk in the other room.  The other spare bedroom looks pretty much the same as this one and didn't have nearly the issues that this room had.  Next step, new bedding...

~ESM

Saturday, August 17, 2013

The Side Project

I've tried to show each step of the renovation as it happened--I'm not sure why, it just seemed like the logical thing to do.  Well, that's a bit easier said than done, since we were in the process of some of the steps for a REALLY (homeowners slacking) long time.  Some of them took over a year--not because they were particularly hard or expensive, but because we were doing it ourselves and don't have a lot of free time.  Anyhoo, we decided to have a contractor fix trim and drywall issues in the three spare bedrooms, which deserves its own post, but in the meantime, I got impatient and starting messing about with the living and dining rooms myself.  They were blissfully free of true decor tragedy and had refinished floors so all they both really needed was paint.  I'm showing the following before photos not to demonstrate that the prior owners were slobs (they were in the process of packing to move--we've all been there, so they get a pass for the mess), this is merely to give you an idea of how things looked before I tackled the walls, etc.


As you can see, in the living room we have what is really neat crown molding with a lot of intricate detail.  I like it.  Actually, I really like it, but what I don't like is the fact that the installer (two owners ago), used knotty wood.  I would prefer to paint it white, but have you ever tried to paint knotty wood?  If someone has devised a way to do this and NOT have the knots show through the white paint, I'm all ears.  Until then, we'll be living with the more rustic than I would like look.  What needed to leave were the window treatments (they were raw pieces of fabric held together with scotch tape--really) and the sponge and plastic bag paint treatment.  Now, I know that there are people in the world who think these sort of paint treatments are the cat's meow.  I'm not one of them.  We'll just leave it at that.  This fireplace is also a constant source of contention between LAM and myself.  I love it.  He hates it.  I'll admit that in this picture it looks pretty bad, but it's solid stone (and the stone goes right through the house into the chimney, front of the house bottom half of the exterior.  I love it.  The grate is a wrought iron piece that LAM thinks looks "medieval", but I think it's just plain nifty.  You be the judge.  Anyway, the top of the mantle isn't great, but could be with some trim.  Easy-peasy.  Ok, so here's a shot of the other side:


About that furniture placement...um, ok, well, let me preface this by saying that this room is BIG.  Like, much bigger than it needs to be and this poses something of a decorating challenge that requires some (although not much) thinking outside the box.  Also, by nature of being a formal living room--who actually uses those anymore, we kept thinking that the space would be better served for something else.  My vote was for a big air hockey table, while LAM voted for a big beautiful black glossy grand piano.  I'll admit that my idea was just silly (although I do love to play) and LAM's idea, while very cool is a little impractical since neither of us play the piano--it would be a giant, very expensive decoration.  We lived with the room as it was it for a while with some furniture from our old house and it came to be known as "Zoe's room" since her favorite pastime is sitting on the couch watching out the two big windows on either side of the fireplace.  LAM answered the big question of what to really use this room for by buying me a glass drafting table for Christmas last year.  We didn't really have anywhere logical to set it up, so the living room became my studio--sort of.  I have to say, it was the perfect solution.  I love the light that comes in the windows and while it's maybe not the most "normal" use of the space, I have come to really enjoy being in the room working on projects.  Also, it's a great place to escape when LAM is watching old NCIS re-runs for the bazillionth time.

Here's how it came together with some fresh paint, window treatments, etc.:


As you can see, Zoe still thinks of this as "her" room and refused to budge for the photo.  S'ok.


This coffee table/storage bench is the best and was an absolute triumph.  I found this on Overstock.com, which if you haven't figured out yet, is the best home decor secret out there.  This exact same piece (not one that looks like it) was recently shown in Restoration Hardware's "Small Spaces" catalog--for more than double the price.  The baskets and lanterns are all from Target's Smith and Hawken line.  I'm still in mourning over the loss of the real Smith and Hawken, so I console myself with the Target stuff.  The baskets are great and super affordable.


This chair is a perfect example of how tastes change over time.  We bought this about ten years ago to furnish our house together when I was still into the whole Waverly/Laura Ashley look.  I still like the gingham back, but the floral is, um,  not my taste.  Since no one ever sits in it, it's pristine and I can't justify getting rid of it.  Sometimes I like it and other times it drives me crazy.  Weird.


I really like this piece and it's a great place to stash photo albums and cd's.  The bunny on top of the book stack was another Philadlephia Flower Show find.  Morihata is the home of the Yoshi towel, which are my very favorite kitchen dish towels.  I know, a really odd thing to pick up at a flower show, but they had a booth.  They are like the ones that Serena and Lily carries, but these are made in Japan.  They are the bees knees for drying wine glasses--super soft and water wicking--plus, they look cool.  What does this have to do with wooden jointed rabbits, you ask?  Not a thing--they just happened to have this little guy in their booth and I fell in love with him.  I kind of have a thing for rabbits.  If you are paying attention and looking around my house, you will find them sprinkled around.  One rule: they cannot be even remotely cutesy.  This guy sits on a stack of books like he owns the place.  I think he's awesome.

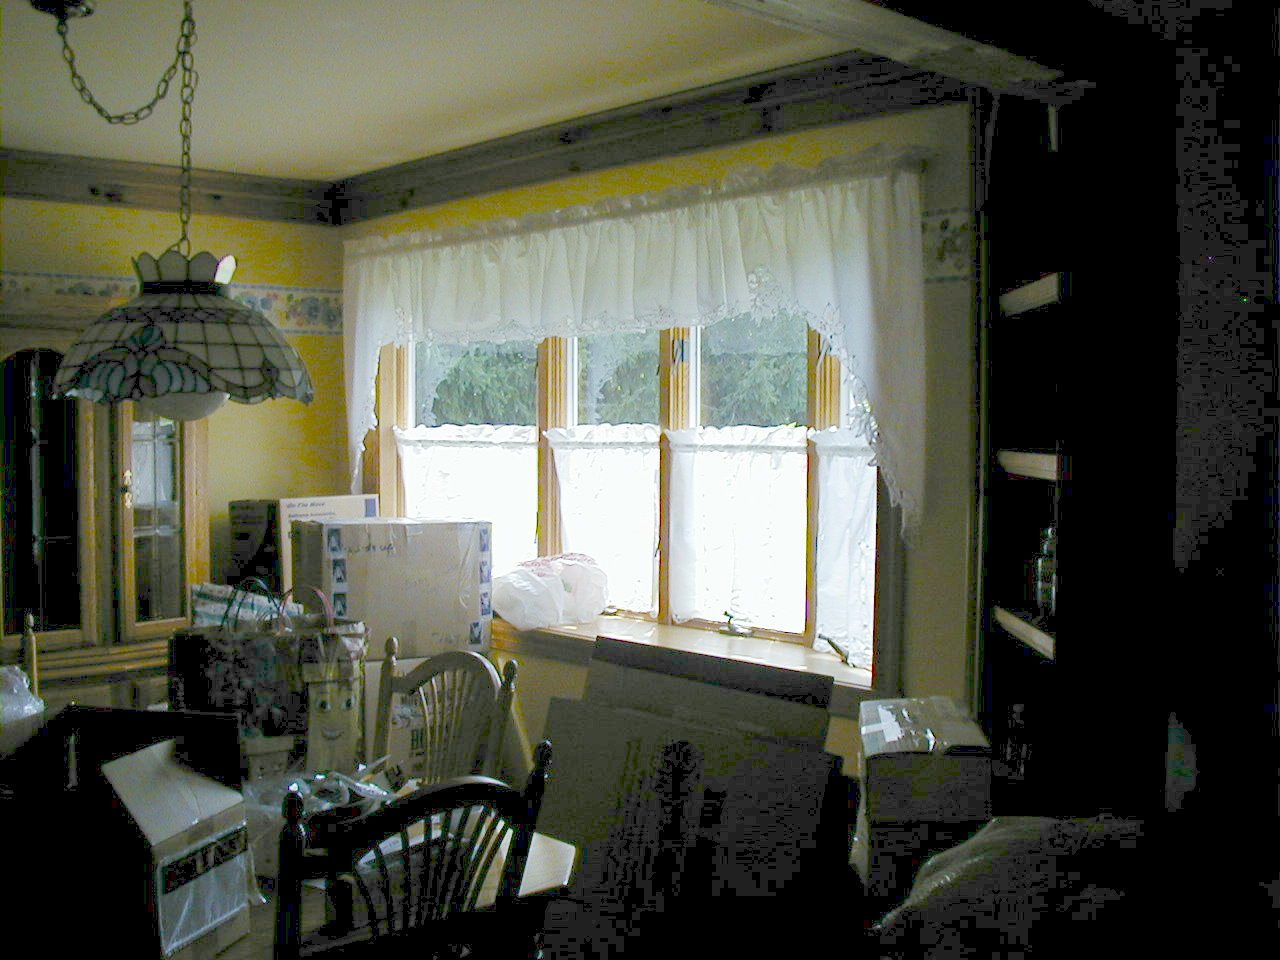
This brings me to the dining room, which suffered from the same affliction as the living room--bad paint, knotty trim, bad window treatments and a really, well...wrong chandelier.  Again, the mess was moving related and so...


Oh, wait, I forgot about the border.  Hang onto your hat, 'cause here comes the other side...


I know, the picture is awful (like that's the worst thing going on here).  LAM took it with a crummy camera.

  And this is the end result:


Eventually, this room will be re-worked but for now it functions well.  I usually change the styling in the built-in and on the window (notice the flying bunny weather vane) with the seasons.  Right now it's sort of in limbo and the emphasis is on other rooms.  The chandelier was an inexpensive hey, this will work replacement, which will be replaced again, just as soon as I decide what to do.  Right now, I'm leaning towards a lantern type dining light.  I like this one from Cape Cod Lantern Co.:


I'm not sure about the finish.  I like the brass, but not sure it works so well in the space with all the warm colored wood.  I'd also like to do a slip-covered chair on each end just to break up all of the BROWN going on in the room ala Restoration Hardware:


I think one on each end at the heads of the table is just the thing and then we have two chairs left over for extra seating.  Unfortunately, LAM hates the idea, so I'll have to change my tactics--maybe play subliminal messages while he's asleep.  Also considering the following Overstock rug as a replacement for the heavy red one:


I have this in my little dressing area and absolutely LOVE it.  It can be found here at FABULOUS prices in every size, but one caveat--it really looks nothing like this in person.  The background is really beige as opposed to gold or yellow tones.  Whenever buying rugs on Overstock, always read the reviews because their photos are NOT color accurate!

~ESM